# Add a Server
> Configure a remote or self-hosted MCP server and test its connection
Add any MCP server: paste its URL, or give Archestra a package or image to run. For a well-known server, pick it from the **Online Catalog**, and Archestra fills in its settings.
You set it up once: where it runs, how it signs in, and who can find it. Everyone else clicks **Install** and brings their own account.
You need [`mcpRegistry:create`](https://archestra.ai/docs/reference/permissions#mcpRegistry:create).
For an MCP server that runs on each person's own device, see [Desktop MCP Servers](https://archestra.ai/docs/mcp/servers/desktop).
## Add a Remote Server
For a server someone else runs, such as GitHub's or Linear's.
1. Go to **MCP Registry** and click **Add MCP Server**.
2. Click **Start from scratch**. To copy a known server's settings, click **Select from Online Catalog** instead.
3. Enter a name, pick **Remote**, and enter the server's MCP URL. A name is unique among the shared servers in one environment, and among your own personal servers there. The same name is free in another environment.
4. Pick how it signs in. See the table below.
5. Open **Advanced**. Under permissions, choose who can find it. To keep it in one [environment](https://archestra.ai/docs/admin/environments), pick that too.
6. Click **Add Server**. On **Test Connection**, install it to see the tools it offers.
7. Cover the new tools in your [Guardrails policy](https://archestra.ai/docs/agents/guardrails/policies).
**Clone** on a server's page copies its settings into this form. The copy's name ends in `-copy`. Put the copy in another environment and it can keep the original name, and the same tool names, because each environment routes its own calls.
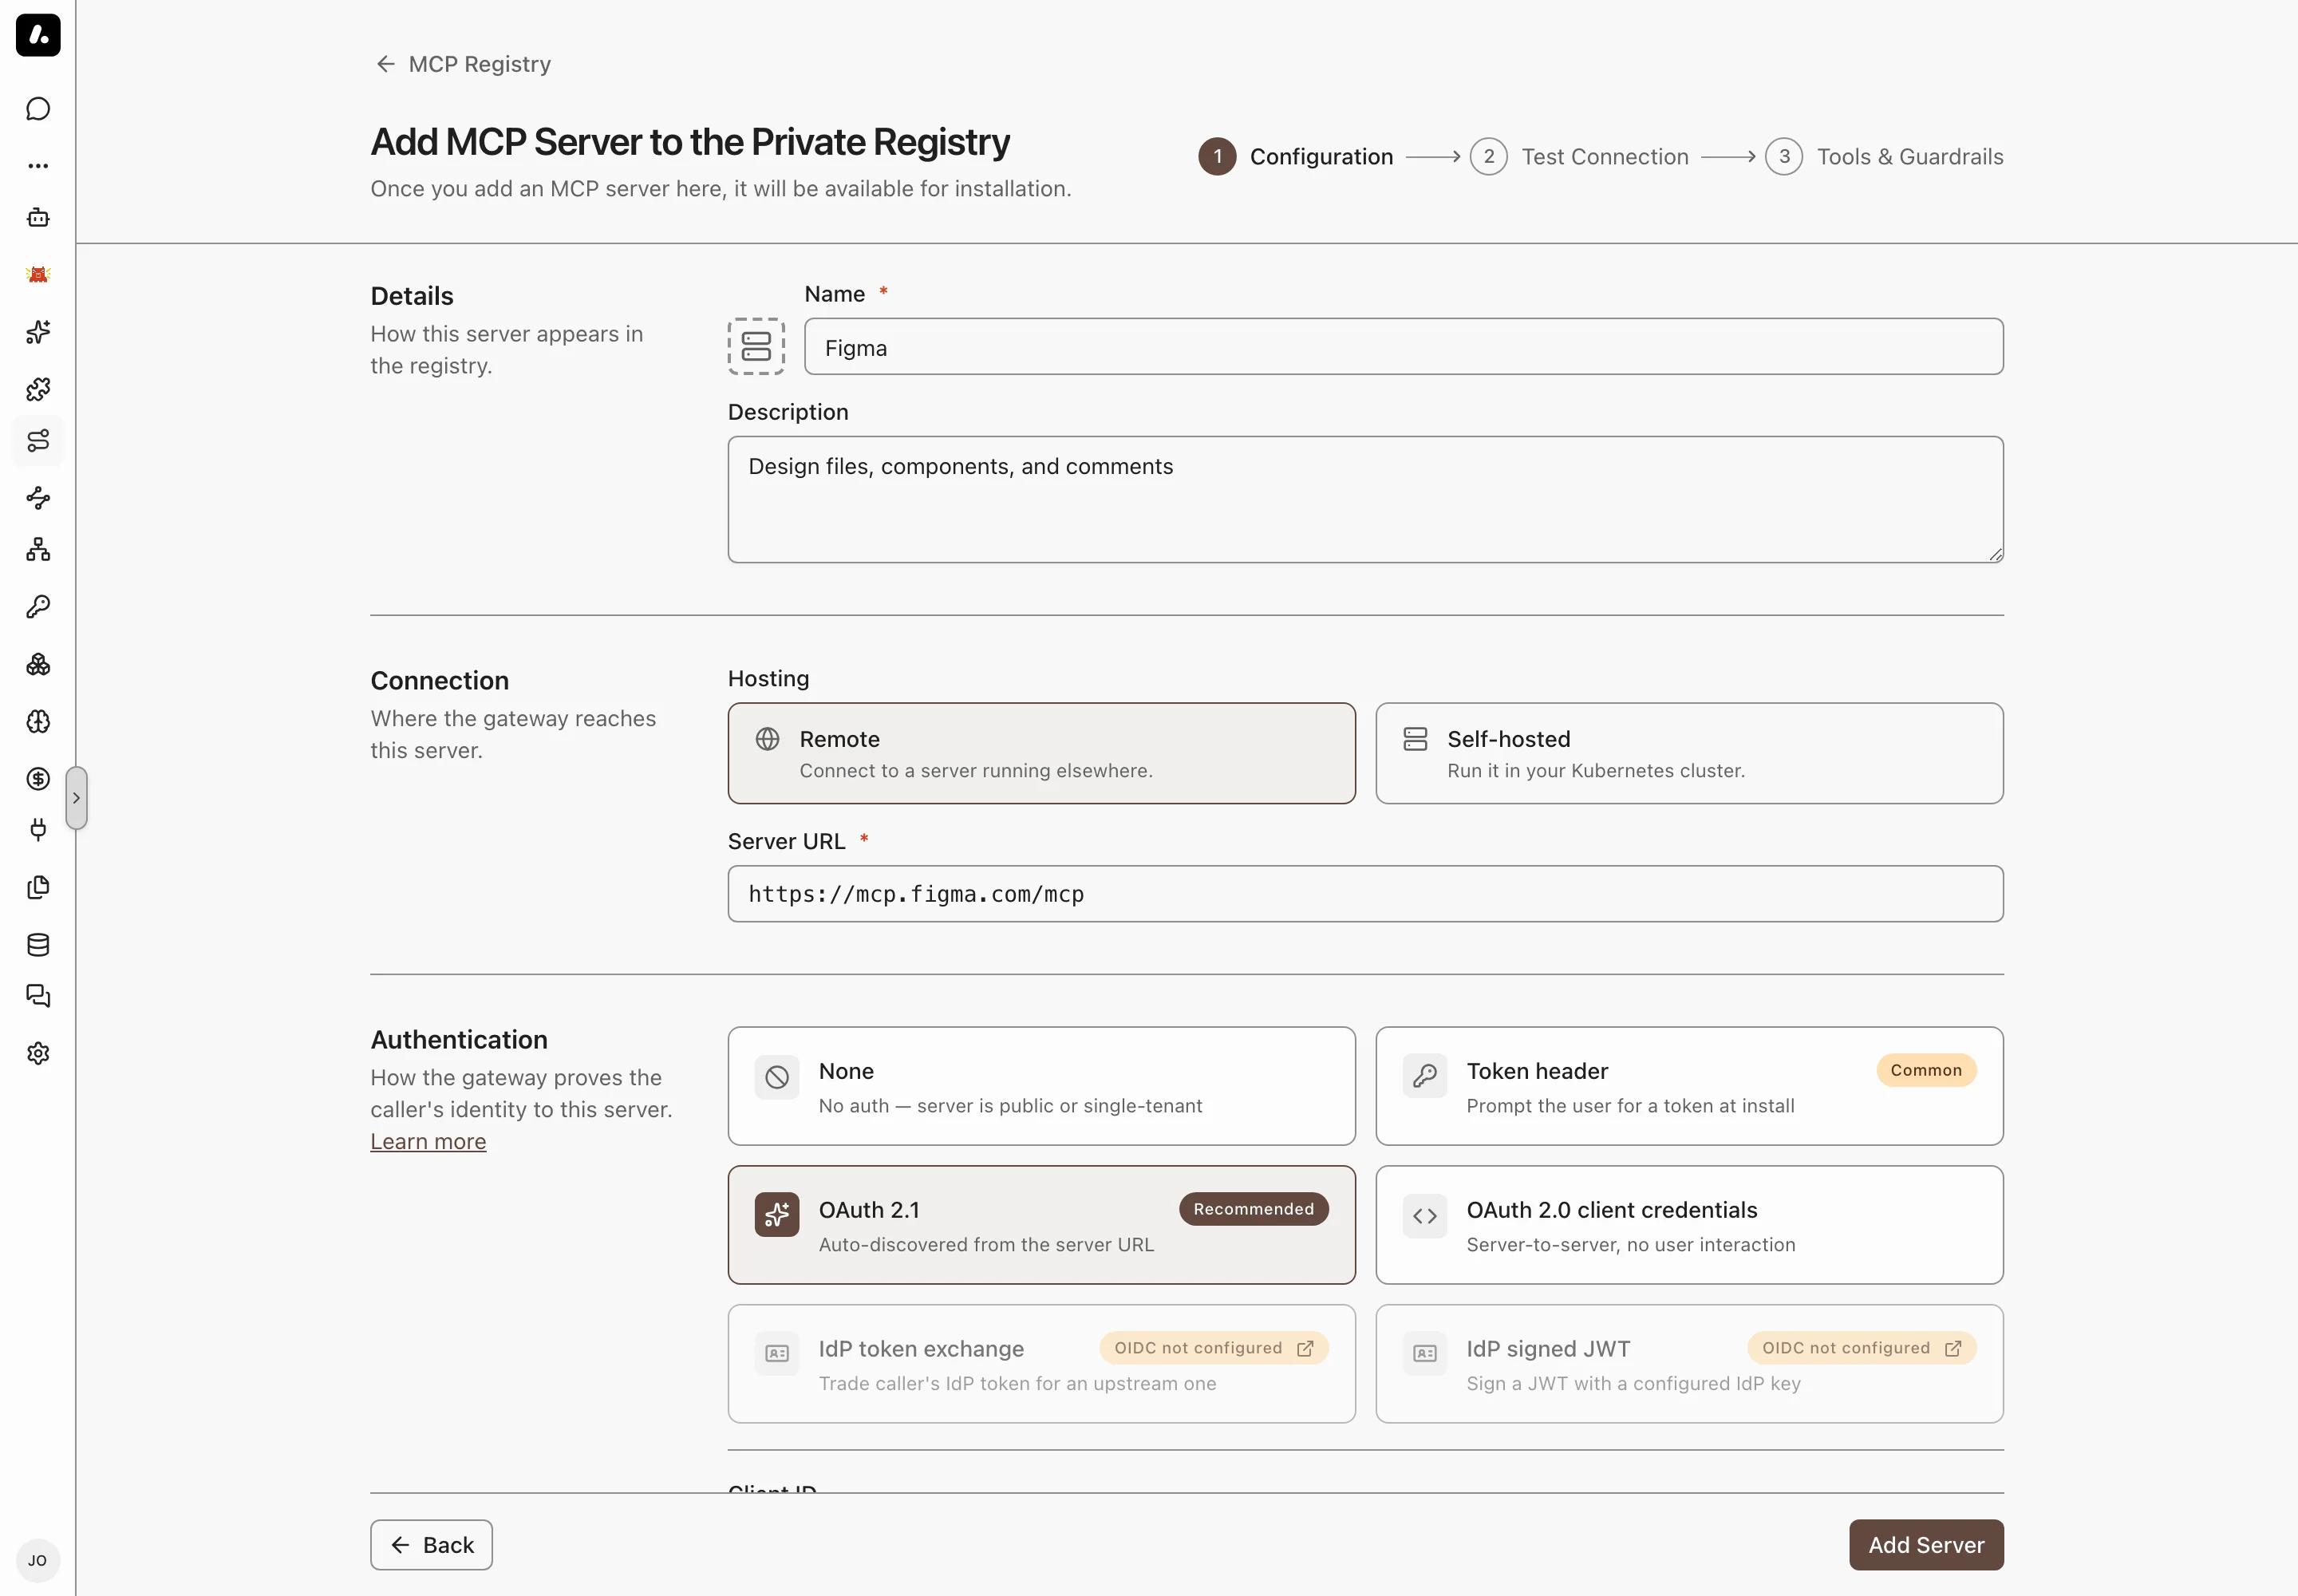
Pick the sign-in the server's docs name. Most hosted servers use OAuth 2.1.
| Sign-in | Pick it when |
| --- | --- |
| **OAuth 2.1** (Recommended) | Each person signs in with their own account. Archestra finds the OAuth settings from the URL. |
| **Token header** | Each person pastes an API key or token when they install. |
| **OAuth 2.0 client credentials** | One app account makes every call, and no person signs in. |
| **IdP token exchange** or **IdP signed JWT** | Calls run as the caller's company identity. See [Identity Providers](https://archestra.ai/docs/admin/identity). |
| **None** | The server needs no sign-in. |
## Add a Self-Hosted Server
For a server that ships as a package or an image, such as one you start with `npx`. Archestra runs it in Kubernetes. See [Self-Hosted Servers](https://archestra.ai/docs/mcp/servers/self-hosted).
1. Follow the remote steps, but pick **Self-hosted** instead of **Remote**.
2. Enter the command and its arguments, or a Docker image. For `npx -y @acme/mcp-server`, the command is `npx` and the arguments are `-y @acme/mcp-server`.
3. Pick the transport: **stdio** for most packages, or **streamable-http** for a server that listens on a port. For HTTP, enter the port and MCP path.
4. Add its environment variables. To make each person enter their own value, such as an API key, mark it for installation. To fill it from a saved [credential](https://archestra.ai/docs/admin/credentials), pick that credential.
5. Click **Add Server**, then install and test it. Archestra starts the pod when you install.
## Headers and OAuth Settings
Most servers need none of these. Use them when the server's docs ask for them.
- **Additional Headers:** fixed values sent with every call, such as an API version or a tenant ID. A gateway's [Custom Headers](https://archestra.ai/docs/mcp/gateway#custom-headers) are different: they pass on headers from the client.
- **OAuth endpoints and scopes:** leave them empty if the server publishes its OAuth settings. Fill them only when sign-in fails without them.
- **Protected Resource:** the resource ID your OAuth provider expects, such as `api://`.