Slack
Connect Archestra agents to Slack channels
Archestra can connect directly to Slack channels. When users mention the bot in a channel, messages are routed to your configured agent and responses appear directly in Slack threads.
Prerequisites
- Slack workspace with admin permissions to install apps
- Archestra deployment — with external webhook access (webhook mode) or outbound internet access (socket mode)
Connection Modes
Archestra supports two modes for connecting to Slack:
| Socket Mode (default) | Webhook Mode | |
|---|---|---|
| How it works | Archestra opens an outbound WebSocket to Slack | Slack sends events to your public webhook URLs |
| Requires public URL | No | Yes |
| Best for | Local development, firewalled environments, VPN setups | Production deployments with stable URLs |
| Credentials needed | Bot Token + App-Level Token + App ID | Bot Token + Signing Secret + App ID |
Choose the mode in the setup wizard (Agent Triggers → Slack → Setup Slack) or via environment variables.
Setup
The setup wizard in Archestra guides you through the entire Slack configuration. Navigate to Agent Triggers → Slack → Setup Slack and follow the step-by-step instructions.
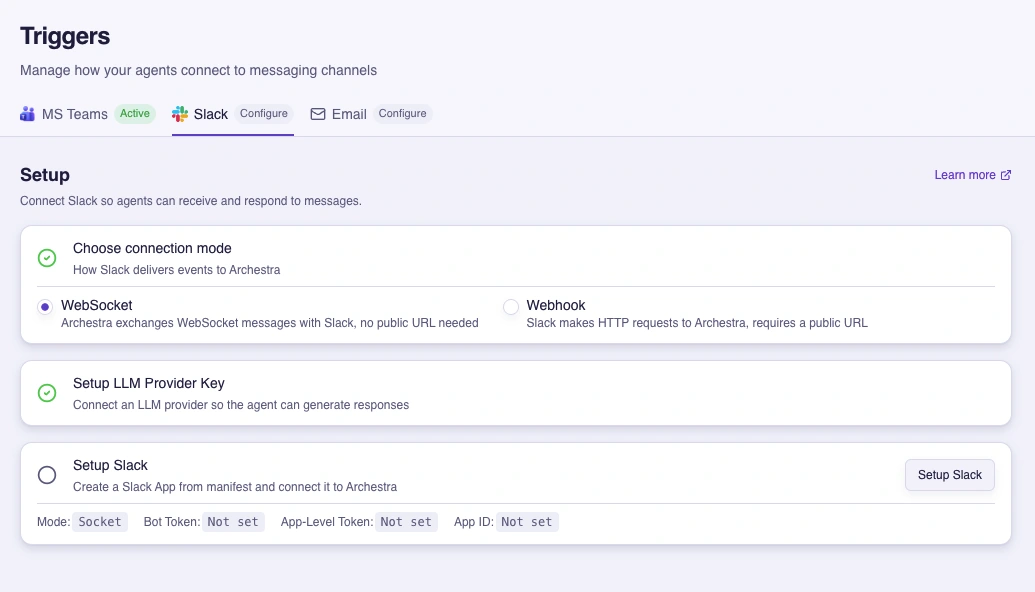
The wizard will walk you through creating a Slack app, installing it to your workspace, and configuring the connection mode. All required credentials are collected and saved automatically.
See Deployment — Environment Variables for the full list of environment variables if you prefer manual configuration.
Usage
First Message
When you first mention the bot in a channel:
@BotName what's the status of service X?
The bot responds with a list of options to choose which agent will handle messages in this channel. After selection, the bot processes your message and all future messages in that channel.
Replying within a thread
In channels the bot stays silent until it is @mentioned. Once mentioned in a thread, it keeps replying to every message in that thread without further mentions. Starting a new thread needs a fresh mention. Direct messages always get a reply, no mention required.
To stop the bot replying in a thread, send mute (you can address it by name with no @mention, e.g. Archestra mute), or react to one of its replies with the mute (🔇) or shushing-face (🤫) emoji. It goes quiet until the thread is @mentioned again. As a reminder, the bot adds a short hint about this to its first reply in each thread.
Commands
Archestra uses native Slack slash commands — type them directly in the message box without mentioning the bot.
The command prefix is generated from the Slack app name in the setup wizard. The default app name uses:
| Command | Description |
|---|---|
/archestra-select-agent | Change which agent handles this channel by default |
/archestra-status | Show currently set default agent for the channel |
/archestra-help | Show available commands |
Default Agent
Each Slack channel requires a default agent to be assigned to it. This agent handles all messages in the channel by default. When you first mention the bot in a channel without a binding, you'll be prompted to select an agent from a dropdown.
You can manage the default agent for each channel from the Agent Triggers → Slack page in Archestra.
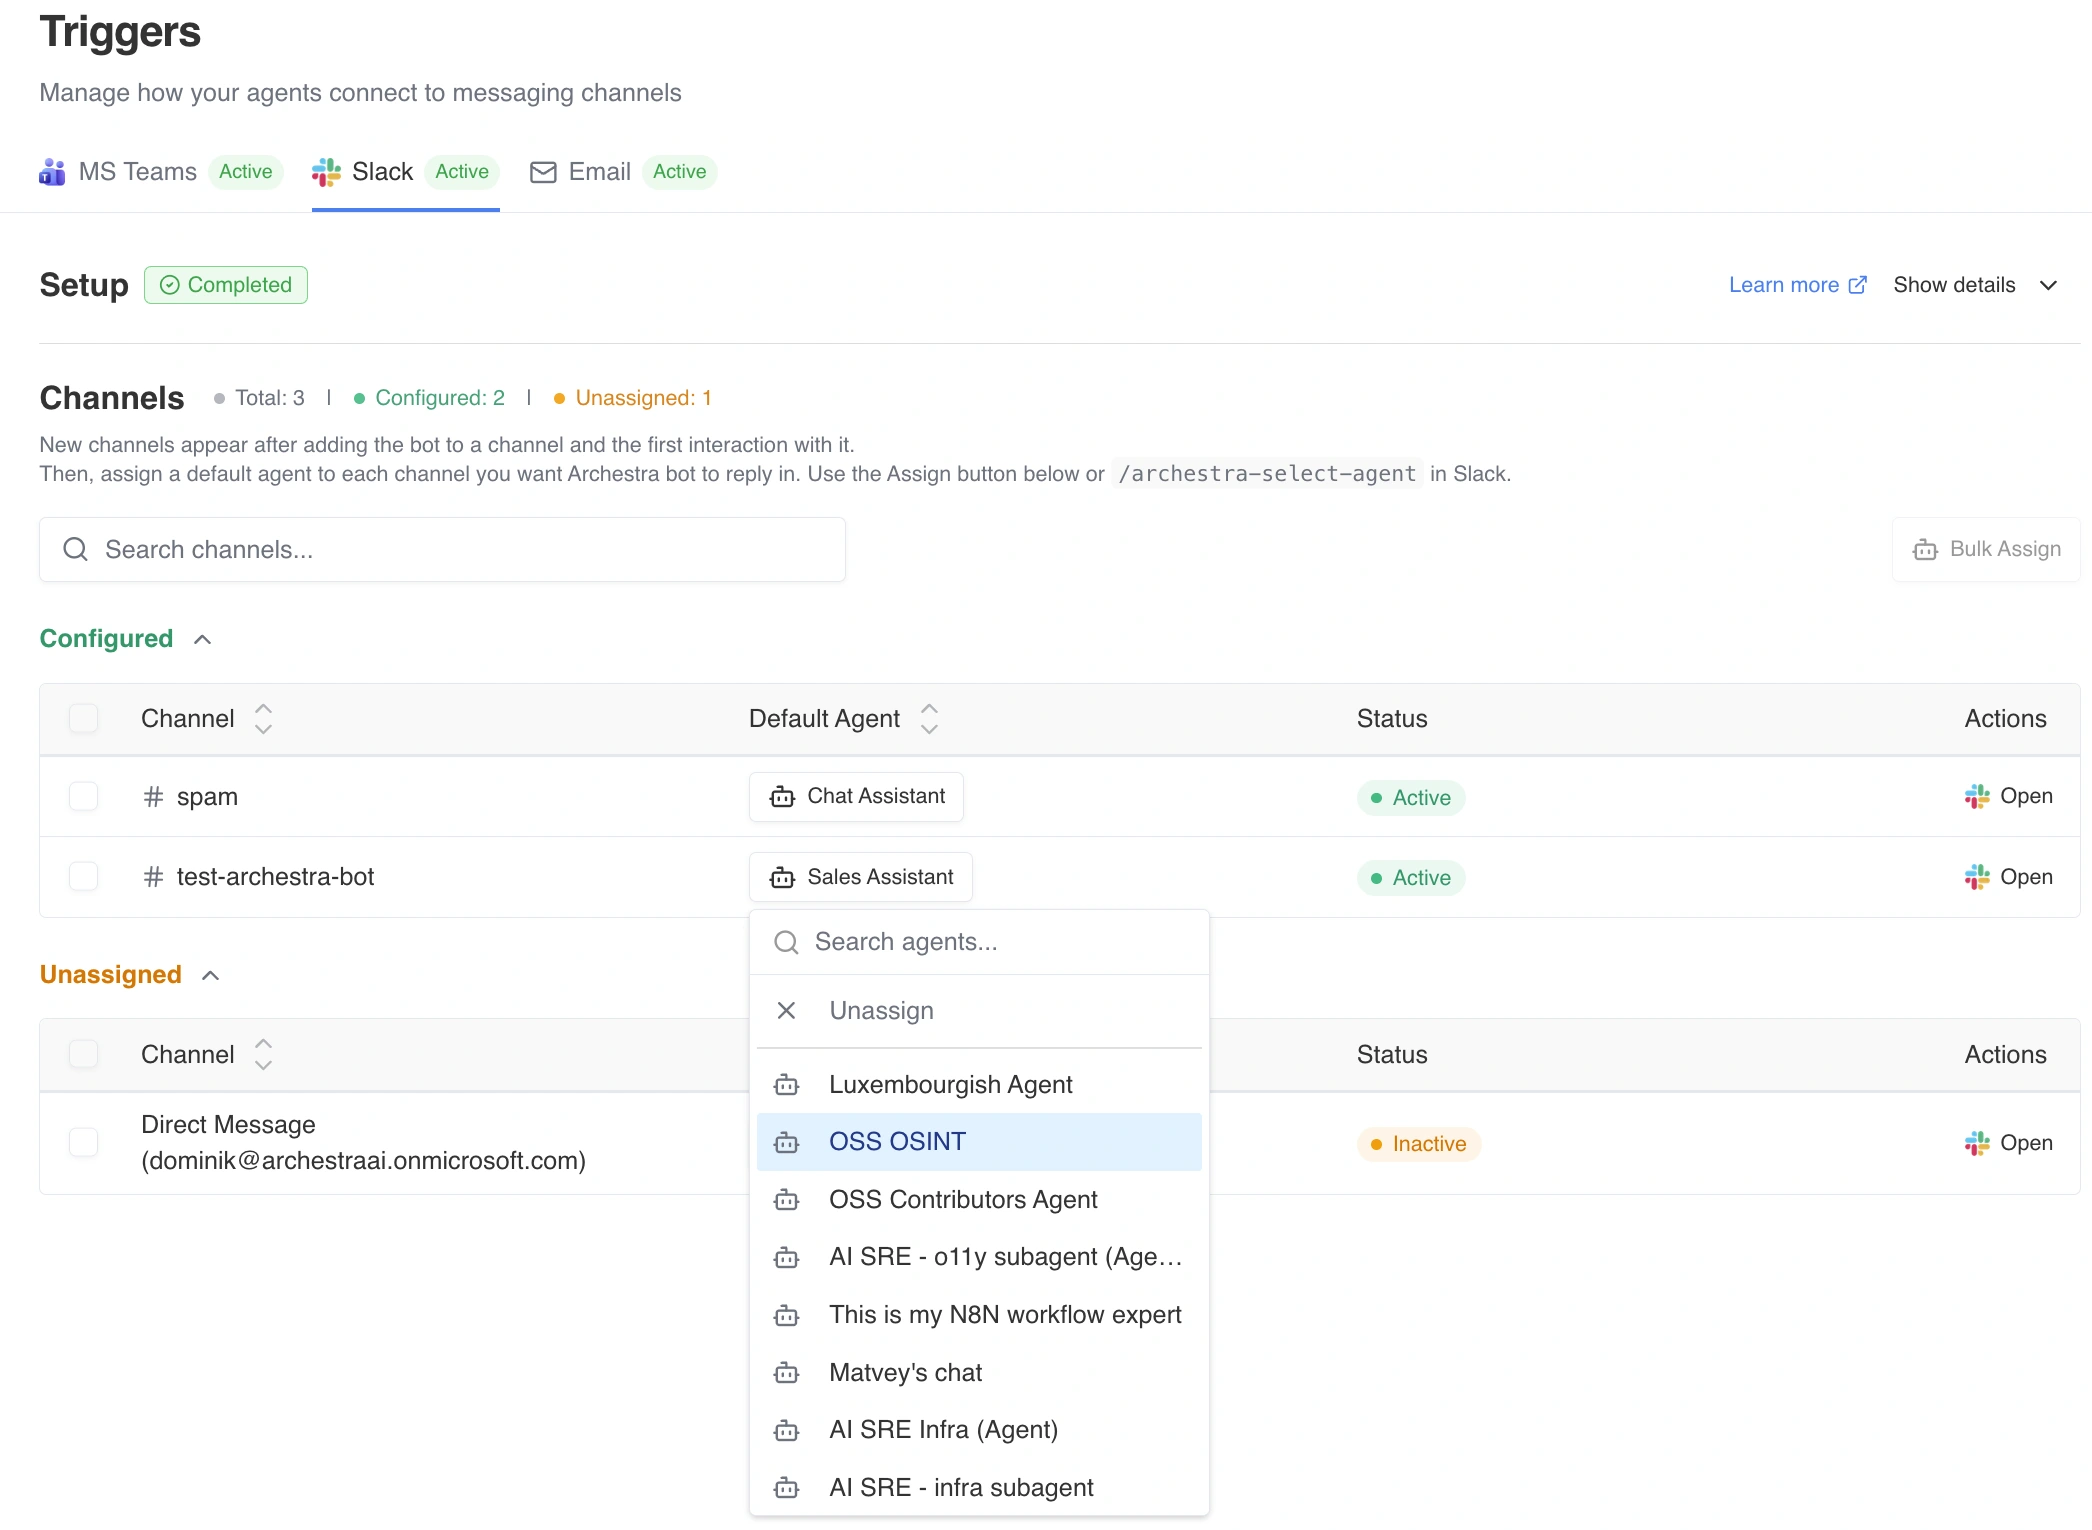
Once set, the default agent processes all subsequent messages in that channel. You can also use the /archestra-select-agent command directly in Slack to change the default agent.
Switching Agents Inline
You can temporarily use a different agent for a single message by using the AgentName > syntax:
@BotName Sales > what's our Q4 pipeline?
This routes the message to the "Sales" agent instead of the channel's default agent. The default binding remains unchanged—only this specific message uses the alternate agent.
Matching rules:
- Agent names are matched case-insensitively
- Spaces in agent names are optional:
AgentPeter >matches "Agent Peter" - If the agent name isn't found, the message falls back to the default agent with a notice
Examples:
| Message | Routed To |
|---|---|
@BotName hello | Default agent |
@BotName Sales > check revenue | Sales agent |
@BotName support > help me | Support agent |
@BotName Unknown > test | Default agent (with fallback notice) |
Direct Messages
A DM with the bot behaves just like another channel — each user can choose which agent handles their DMs. On your first message, the bot shows an agent selection card. Use /archestra-select-agent to change it later.
The Slack app manifest already includes
im:historyandmessage.imscopes/events required for DMs.
Autoprovisioning Slack Users
When a user interacts with the bot but hasn't signed up in Archestra yet, they are automatically provisioned with the Member role and no teams assigned. The user receives a unique invitation link via Slack DM that they can use to complete sign-up and become a full Archestra user. Until they do, they cannot log in to the Archestra web app.
Admins can view autoprovisioned users on the Settings → Members page — from there they can copy the invitation link or delete the user.

Attachments
Messages sent to the bot can include file attachments (images, PDFs, documents, etc.). Attachments are automatically downloaded and passed to the agent for processing. Files the selected model can read — images, PDFs, and text documents such as CSV, TSV, JSON, XML, YAML, TOML, and Markdown — are included inline in the agent's context. When the agent has a code sandbox, other file types (for example a SQLite database or a ZIP archive) are placed into the sandbox so the agent can open them with its tools. Anything that still cannot be provided is noted by name so the agent can tell the user. A message that contains only a file (no text) is processed too.
Limits:
- Max 20 attachments per message
- Max 10 MB per individual file
- Max 25 MB total across all attachments in a single message
Files exceeding these limits are silently skipped.
Troubleshooting
Bot not responding
- Webhook mode: check webhook URL is accessible externally
- Socket mode: check backend logs for "Socket mode connected" message
- Confirm the bot is added to the channel
"Request verification failed" (webhook mode)
- Check that the signing secret matches the value on the Basic Information page
- Ensure server clock is synchronized (Slack rejects requests with clock skew)
Socket mode disconnects
- Verify the App-Level Token is valid and has the
connections:writescope - Check that the Archestra backend has outbound internet access
- The socket mode client auto-reconnects — check backend logs for reconnection attempts
Missing channels
- The bot must be invited to the channel first:
/invite @BotName
"Could not verify your identity"
- Ensure
users:readandusers:read.emailscopes are configured under OAuth & Permissions. Reinstall the app after updating scopes.
"Slack is configured for Socket Mode" error on webhooks
- This means Slack is configured to use socket mode but events are arriving via webhooks. Check that your Slack app has
socket_mode_enabled: truein its settings, or switch Archestra to webhook mode.